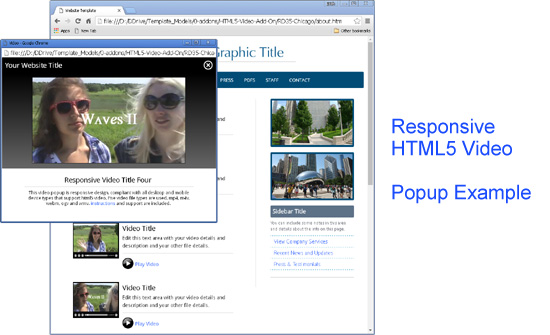
HTML5 Video Setup
Website template responsive video applications
Responsive HTML5 video:
Support for Allwebco responsive popup and on-page video. See the help page included with your download for the correct info and support links. The videos can be setup in a gallery style with popups, or they can be added directly to your HTML webpages. Addons purchased after 10/26/16 will be responsive web design.Video file format:
Video file types included with this video style will be: mp4, m4v, webm, ogv and wmv. 5 total videos need to be created. See below for details on each of these video types.
Before you start:
Check that your hosting account is setup to allow streaming video and allows for the following video "mime" types: mp4, m4v, m4a, ogv, ogg, oga, webm, wmv. Also see "Tips & Troubleshooting" below on this page and streaming website video support.
Contact your hosting company or check your hosting control panel to confirm video streaming and "mime" compatibility in your account. Go to Allwebco Hosting for quality hosting that offers these features.
Overview: About the HTML5 Code
The videos and "video-?.js" video code files for the HTML5 "page" type video can be found in the subfolders "video-1" though 4 or 6 in the "videos-HTML5" folder. The popup HTML page that is displaying the videos will be in the "videos-HTML5" folder. The page that has the popup links is named "videos.htm" and is in your main web template folder. Click below to view the "video-1.js" source code.

Setting up video #1 EXAMPLE:
- In the "video-1" folder inside the "videos-HTML5" folder, replace 5 videos with your video files.
- Replace "video-1.mp4" "video-1.m4v" "video-1.webm" "video-1.ogv" and "video-1.wmv".
- We used the OGG Video Converter to convert all our videos (See section below).
- See the help page included with your addon in the options section to change the video size. Edit the popup window page size in the "videoHTML5-popups.js" or "pop-closeup.js".
- In the "videos-HTML5" folder edit the "video-1.htm" with the description of your video #1.
- In your main template folder edit the "videos.htm" with the description of your video #1.
- Open the "video.htm" and test your video by clicking on the first "Play" button. See "testing" below.
- Do the steps above for video #2 though #4 or #6.
About the movie file types
5 video types are setup in the HTML5 video template/addon code. These are the 5 most popular types and will allow for the highest compatibility in popular web browsers. Here are the details:
|
Type |
Browser Support |
codec |
|
mp4 |
Chrome, IE9+, Safari, iPad, iPhone, Android, Blackberry |
(H.264) |
|
m4v |
Chrome, IE9+, Safari, iPad, iPhone, Android, Blackberry |
(H.264) |
|
webm |
Chrome, IE9+, Opera (Firefox - limited) |
(VP8) |
|
ogv |
Firefox (some versions) |
(OGG) |
|
wmv | Non HTML5 PC Windows browsers (XP), IE7, IE8 |
Windows |
mp4
The most popular file type for HTML5 video. Works on most mobile devices as well. Be sure when converting your video files to mp4 you use the H.264 (*mp4) option if available.
m4v
Almost the same as mp4. Can be skipped if you want to use only 4 video types.
webm
Required to display videos in Opera and some versions of Firefox.
ogv
Required for most versions of Firefox.
wmv
The wmv option is included for all PC browsers that do not support HTML5, most notably for display in the still popular Windows XP. Mov for Mac was not included due to the fact that most Mac users upgrade their browsers when available and HTML5 support is more widespread in Mac browsers.
How We Created the Template Video Samples:
Creating movies for web use
We used Windows Movie Maker included free in Windows, and also "Sony Vegas Movie Studio Platinum Pro" for editing and outputting all our template movie samples as WMV files first, then we converted the WMV files (see details below).
You can create WMV movies in Windows Movie Maker, Sony Vegas, or any other video editing software using your AVI, MPG, MPEG or WMV files. When you have completed your editing, you can "export" your movies for web use. In Windows Movie Maker and Sony Vegas, choose "File" then "Save Movie File", choose "My Computer", choose file name and save location, choose "other settings" and "High quality video (small)" for a 428 x 240 video and click "next" to create the file. In Sony Vegas you can edit and output your movies in any custom size.
Converting movie files
There are many converters available to easily convert your movie files to the 5 types you will need. We found the OGG Video Converter to be the best choice for ease of use and number of conversions available. This should be the only software you will need.
Recommendations when editing the videos:
If possible make your movies not fade-in or fade-out so the video will display the last and first frame of the video when it is not set to "not autoplay" or when the movie is finished playing.
If you are editing your own videos you can place a .jpg image for the first and last movie frames in most editing software.
HTML5 Video Options:
Changing the video file name
To change the file to use for the HTML5 video edit the "video-?.js" in the "video-?" subfolder inside the "videos-HTML5" folder. Edit the "video-?" variable near the top of these .js files.
Editing video sizes
See the help page included with your addon download for directions to edit the size of the videos. Windows Media controls are 45 high and are automatically added for the wmv files.
Turning off video file types
Edit the "video-?.js" in the "video-?" folder inside the "videos-HTML5" folder. Any one of the 5 file types can be turned off with a "yes" or "no" option in the "// VIDEO TYPES TO USE" section.
Overlay play button
The overlay play button is used only when a video is not set to autostart. The button is named "videoplay.png". Edit the "video-?.js" in the "video-?" folder inside the "videos-HTML5" folder to change the name of the image and image size to use for the "overlay play button". You can use any png or jpg image and can edit the size for this button. In the .js file, make the button sizes 2 pixels larger than the actual image size to compensate for the hover border. Do not make the button larger than the video.
NOTE: The overlay button is set to not display on iPad and iPhones.
Using the "on-page" style video setup
To setup videos as "on-page" rather than as popups, and for all options for "on-page" video, see the "help-video-ONPAGE.html" included with your download. If you do not have this help file contact us to request a new download.
CSS font and styles
All CSS code for the video pages, borders and background colors, can be edited in your template CSS file. Layout css styles are in the "video.css" in the "videos-HTML5" folder.
Adding another video
You can copy the existing code to add more videos. Here are the steps.
- In the "videos-HTML5" folder, make a new subfolder and name it "video-5" (or 7) we will use "video-5" in this example.
- In the "video-5" folder create 5 new videos: "video-5.mp4", "video-5.m4v", "video-5.webm", "video-5.ogv" and "video-5.wmv".
- From the "video-1" folder copy the "video-1.js" and "video-1.jpg" files into the "video-5" folder. Rename them "video-5.js" and "video-5.jpg".
- Open the "video-5.js" and edit the "video-1" to "video-5" in 2 places.
- In the "videos-HTML5" main folder, copy the "video-1.htm" and name it "video-5.htm".
- Edit the "video-5.htm" and change the following code from 1 to 5 in two places as shown below
<script type="text/javascript" src="video-5/video-5.js"></script>
- OPTION #1 Open the "videos.htm" page and search for the "START VIDEO 4" note. Copy this code group and paste it below itself. Edit the "video-4" in 3 total places to "video-5" so the new area will show the thumbnail .jpg in the "video-5" folder and popup video #5.
- OPTION #2 Copy and edit the code as in the step above and paste it into any of your other HTML pages.
- Test the "videos.htm" page or the page you added the video to.
HTML5 First Frame "Poster" Feature:
Problem:
On movies without autoplay, the movie shows as a blank black box on the page, or only the overlayed play button displays.
In older browsers:
In older non-HTML5 browsers like IE8, the movie may show as a black box. This is because IE8 does not support HTML5 video and the wmv fallback "object" and "embed" code is being displayed. See solution #2 below.
About the HTML5 first frame poster feature
HTML5 video does include a "poster" attribute. This feature specifies an image to be shown while the video is downloading, or until the user hits the play button. The "poster" feature was not included because it is not working properly on many devices including iPhone and iPad.
Solution #1:
Optionally, the first frame of your movie can be the "poster" if your movies do not fade-in or if you can edit them to not fade-in, then the first frame of the movie will display in HTML5 compliant browsers when the movie is not playing. For more details on HTML5 video options and attributes see the HTML5 <video> tag at w3schools.
Solution #2:
The .js files include an overlay button. You can use this button to display an image layered over the video. This button can be any size smaller than the video, and can be a .jpg or png image. You can set the image file to use and the size of the image in the .js files in the "videos-HTML5" or "videos" folder. See "Overlay play button" in the visual below:
Troubleshooting Section:
Problem: video not working when uploaded:
It is common for the videos to not work once uploaded in some browsers. This is because of "mime" types a hosting server allows. It is advised that you contact your hosting company to have the following "mime" types allowed on your hosting server.
AddType video/mp4 mp4 m4v
AddType audio/mp4 m4a
AddType video/ogg ogv
AddType audio/ogg ogg oga
AddType video/webm webm
CAUTION: The above text is from a file named ".htaccess". Do not edit your ".htaccess" unless you are sure what you are doing. This is a server file and should not be edited by novice users. It is advised that you contact your hosting company for help with this configuration. You can copy the above code to send to them as an example.
Tips & Troubleshooting:
- Create a page with only a single video on it for testing.
- Be sure any page you have added videos to includes an HTML5 doctype.
- Slow Videos: You may need to contact your hosting company and have "video streaming" installed as well as configuring to allow all "mime" types as listed above. (mp4, m4v, m4a, ogv, ogg, oga, webm, wmv). See also streaming your website video.
- Do not use spaces in any video file or .js file names.
- Hosting Tests: Try uploading the default template setup files from Allwebco Design to test your hosting. You can always contact Allwebco for a fresh download.
- Choppy Video: See slow videos above and also try re-saving your videos with other settings. Be sure to convert mp4 as "mp4 H.264". There may also be issues with your converting software. Contact your conversion software vendor.
- Check Your Hosting: You may need to contact your hosting company to see if they support these mime types. Optionally, you may need to switch hosting companies. See Allwebco Hosting.
- Videos Not Working at All: See Items Missing After Uploading and also Files not Updating.
- Known hosting companies that may not have streaming: Lunarpages. You will want to contact them to have streaming added.
- For GoDaddy hosting users see MIME types in GoDaddy support.
On some websites if the images are set to display as "block" elements by default, and if you set the autoplay to off, the play button may not be centered. To fix this edit the "video-ONPAGE.css" in the "colors-video" folder and add the highlighted style as shown below:
/* OVERLAY BUTTONS */
.Vborder { border: #FFFFFF 1px solid; display: inline; }
.Vborderon { border: #FF0000 1px solid; display: inline; }
Note: The above may not work if you have pasted the code from the "Add CSS" step above your css "includes" in the head section. Paste the "Add CSS" code below your other css in the head section of the page.
Video Converting Software:
Windows: To convert your videos to all 5 HTML5 video types Allwebco used the OGG Video Converter. We found this software to be fast, reliable and very easy to use. Many other video converters are available if you try some searches at Google.
User recommended Free Make Video Converter. See notes below.
Mac: For converting video on Mac see Miro Video Converter. This was recommended by a user and is a free, open source converter, but has not been tested by Allwebco.
Converter software issues:
One user has had problems with the "Any Video Converter" so this conversion software is not recommended.
Converter notes from template user Brian:
Unfortunately I did not keep the "Any Video Converter" software on my machine so I cannot tell you which version I had (Maybe 3.3.4). It had to have been one of the newer versions because I downloaded it probably 4-6 weeks ago. The video converter I am using now is called Free Make Video Converter.
Both of these are free downloadable converters. Both have their limitations, but besides compatibility, what I like about the Free Make video converter is when you choose HTML5 conversion it creates the webm, ogv, and mp4 files in one step all at once. With Any Video converter you had to do each file separately.
Video editing software:
You can use "Windows Movie Maker" included with most versions of Windows. Check the Microsoft Movie Maker Website for details. Movie maker can edit .avi and .mpg movies, however, this is a limited version of the software and does not include a lot of editing options.
The following software includes many more video editing options including animated captions, better transitions as well as .flv conversion for Flash video.
Video Options Overview
Responsive Website Video Code
Streaming Video
YouTube Video
HTML5 Video Player Add-on
Responsive Video Popup Add-on Video Not Working
Gallery for Video Display
Template Responsive Video
Pagetype HTML5 Video
Pagetype HTML 4.01 Video
Video Message
Video IFrames (1)
Video IFrames (2)
Responsive Website Video Code
Streaming Video
YouTube Video
HTML5 Video Player Add-on
Responsive Video Popup Add-on Video Not Working
Gallery for Video Display
Template Responsive Video
Pagetype HTML5 Video
Pagetype HTML 4.01 Video
HTML5 Pop Video
HTML 4.01 Pop VideoVideo Message
Video IFrames (1)
Video IFrames (2)

Small Business Layouts
Website designs with built-in video, dynamic slideshows, HTML forms, a mobile version website and more.
Royalty Free Music
Music for presentations, film, video and other web media projects.
Minisite Video
Developer grade web templates with integrated video design.
HTML5 Video Addon
HTML5 / CSS video player website plugin.